
May 29th 2021
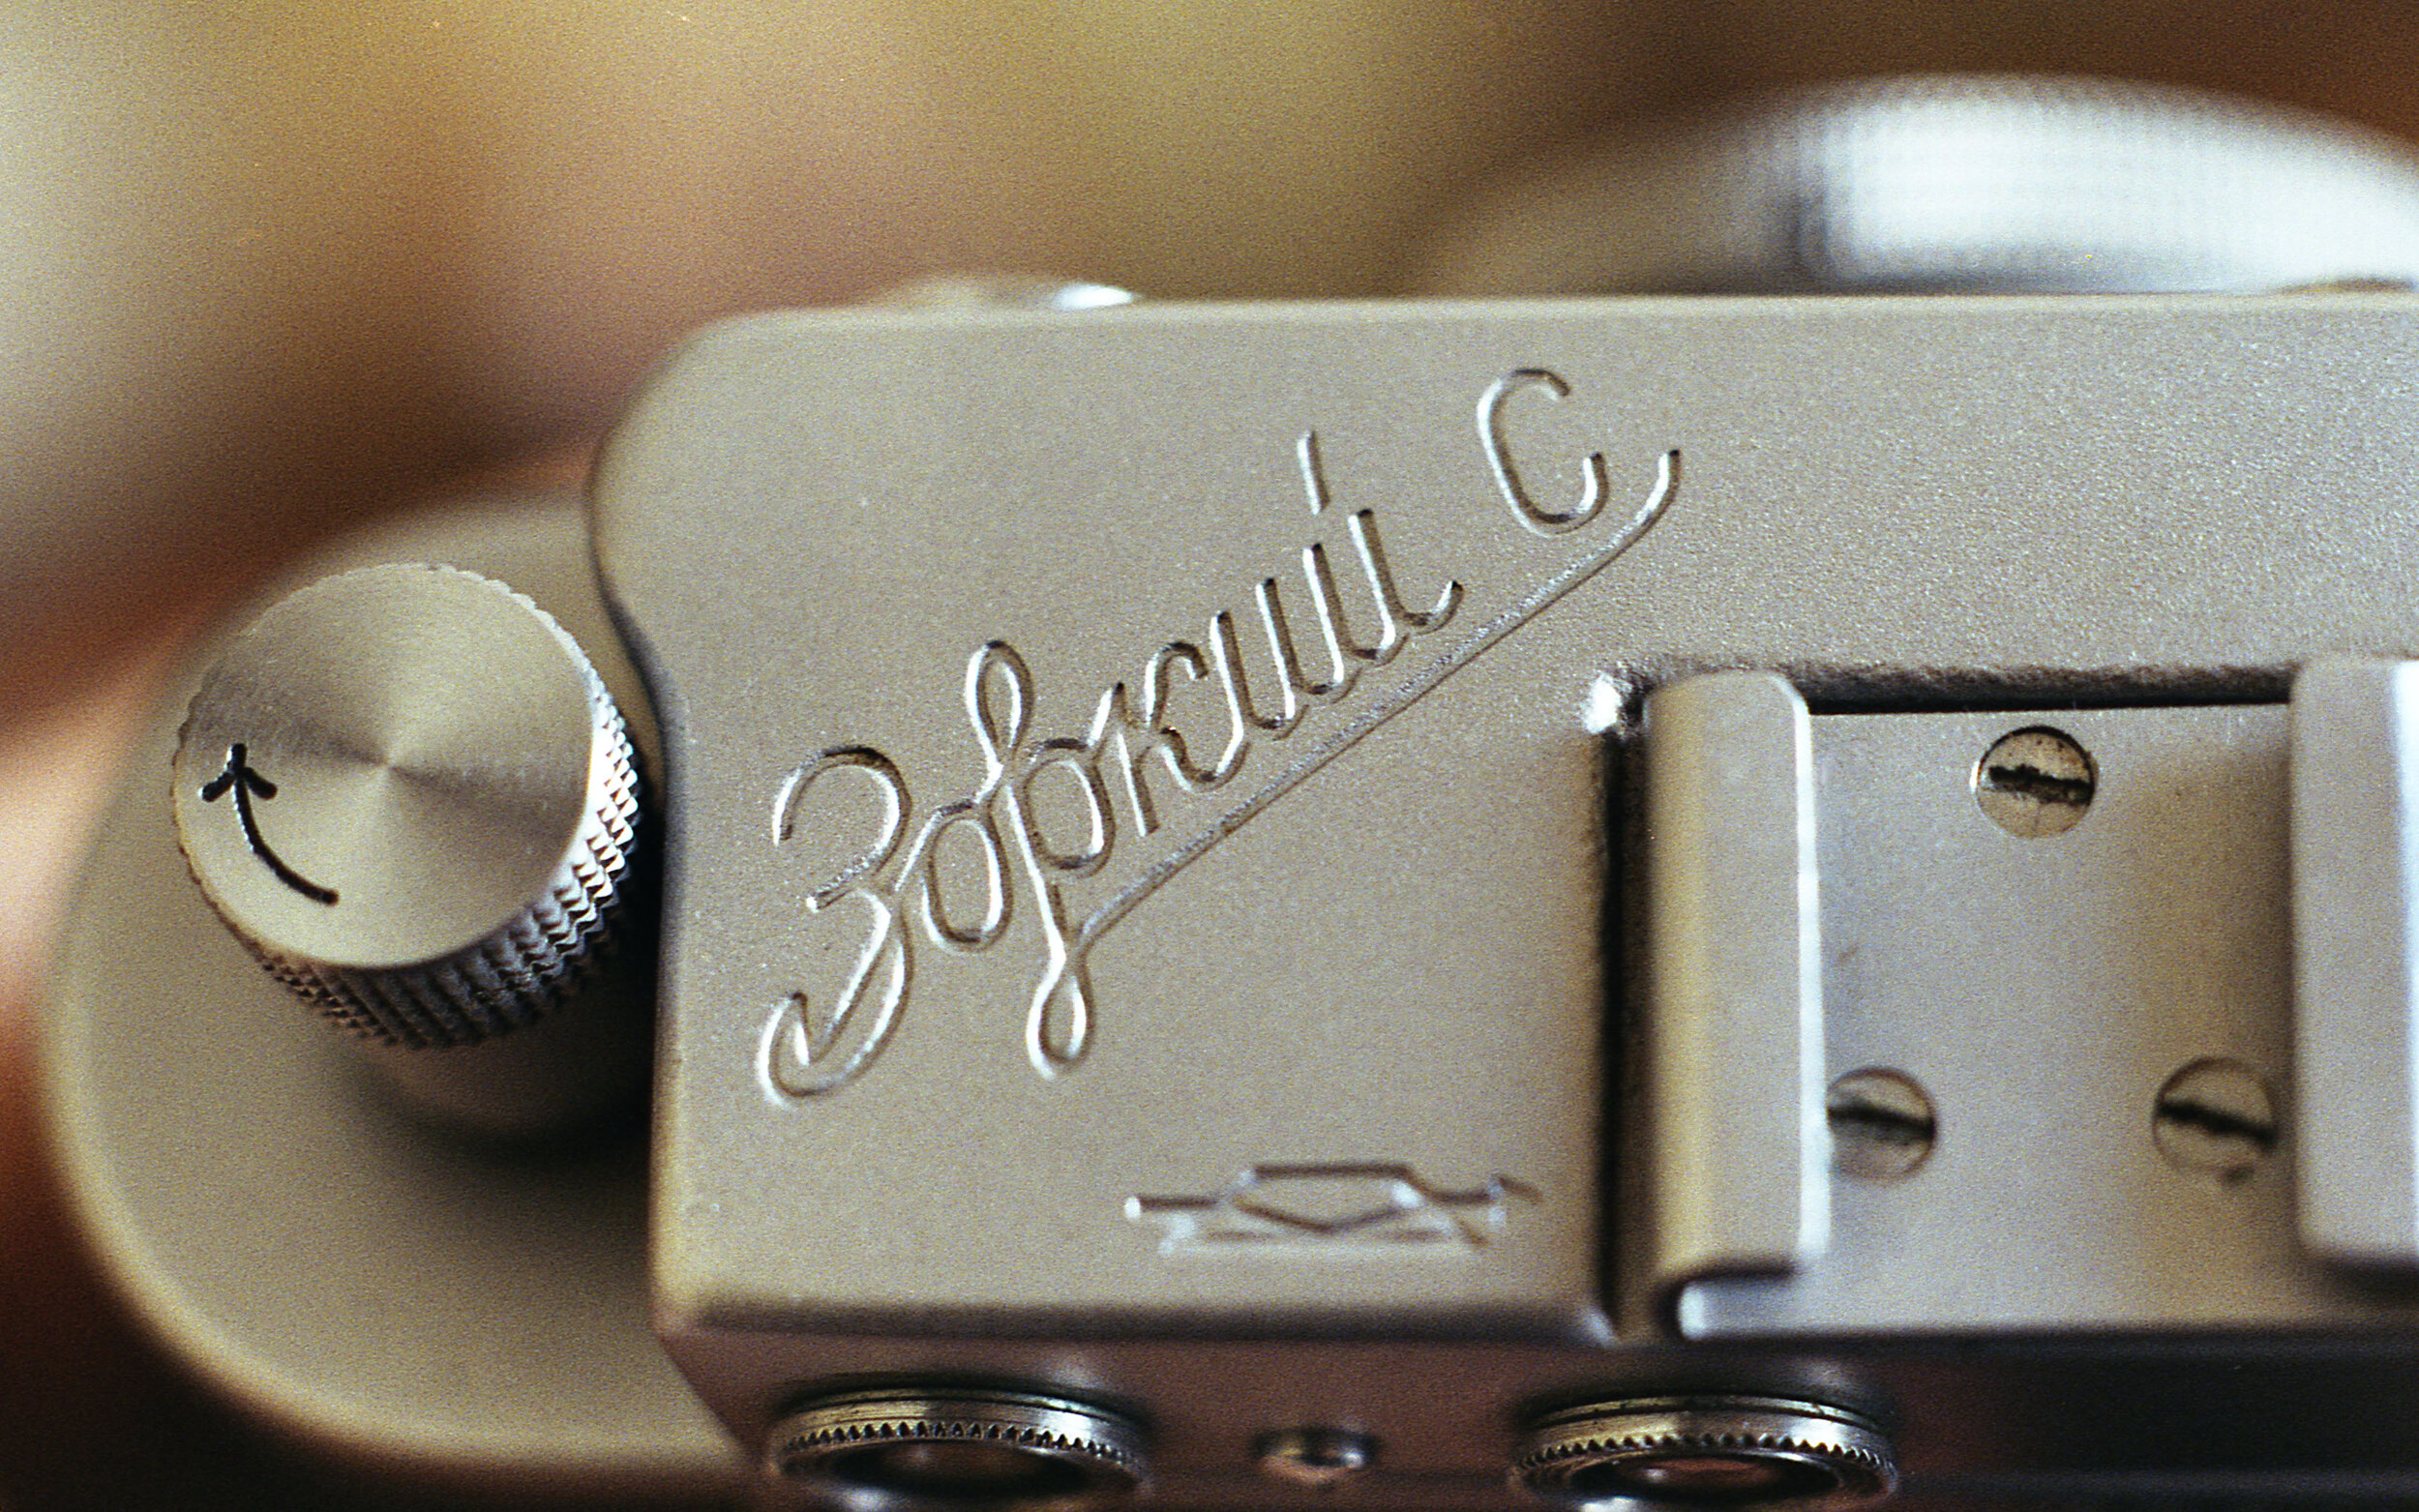
KMZ Zorki S
After World War II, Russian copies of German and Swedish cameras became quite prevalent in eastern Europe. The tooling from various factories was taken as compensation to Russia, and camera production commenced soon thereafter. Early on, factories like KMZ (Krasnogorsky Mechanicheskiy Zavod) produced exact copies of Leica cameras, before venturing to create cameras of their own designs. The Zorki was one of the first Russian copied cameras to come out of this era. Commonly referred to as the Zorki C due to the Cyrillic S, the Zorki S was the first in the Synchro series of cameras, introduced in 1955.


The Russian Leica II Update
Unlike the original Zorki, this is not an exact copy of the Leica II, but more of a redesign. Changing up the top cover but sticking to the basic Leica design aesthetic, the Zorki S looks and performs like a quality rangefinder from the time. Still built to a high degree of precision, the Zorki S has significant weight as well as a professional fit and finish. Entirely made of metal, the body consists of a black painted textured grip, accented with polished chrome screws. The rest of the body is made up of matte aluminum with a slight polish to the controls. A beautifully designed camera and an incredibly solid feel when you hold one.
The Zorki S is one of the earlier designed rangefinders that have separate focusing and framing/taking windows. On the back of the camera, the windows are on the smaller side right next to each other. The window you look through on the left is the rangefinder, with quite a large focusing patch in the center. Very easy to differentiate between the two images. The window to the right is the framing and taking window. No markings or frame lines are present, but it is a rectangular image. Focusing is achieved by whatever M39 mount lens you have attached. The early stock lens was the Industar-22 50mm f/3.5 collapsable lens. A copy of the Zeiss Elmar Tessar design, and an incredible one too.
All other controls are located on the top of the camera. Winding is done with the large knob to the right, turning clockwise in the direction of the arrow. You wind until you feel resistance (on my version at least) and then take the picture with the shutter release to the left. The shutter release has very uncomfortable jagged edges, so a screw in cap is recommended. Under the winding knob sits the frame counter. It needs to be set manually and can be adjusted at any time in both directions. Once wound, then you can change the shutter speed. You do this by lifting up the dial and turning to the speed you would like. The speeds range from Bulb and 1/25th to 1/500th of a second. DO NOT go from bulb to 1/500th or vise versa. This and changing speeds before winding can potentially wreck the shutter mechanism. Another thing to note is while winding, the shutter speed dial turns counterclockwise and when you press the shutter it rapidly turns clockwise. Do not interfere with the shutter speed dial when you are winding or taking a picture. It can cause the shutter curtains to hang up, mess with timing, or possibly damage something. The unfamiliar mechanism under the shutter speed dial is what makes this an upgrade from the previous Zorki, the flash timing dial. With a flash connected to the cold shoe and a PC cable connected to the port under the winding knob, the final step you will need to do is adjust the flash timing. The S in Zorki S stands for Synchro, and you are able to change the delay from 0 (zero) or instant to 25 milliseconds. This was intended for the speed of different flashbulbs of the time, and to tune the shutter sync speed accordingly. Today, to have this camera work with an electric flash, you would set the sync speed to the 0 (zero) setting.
This camera is based on early 35mm camera designs, where bottom loading was more common. To open the bottom of the camera, you must pull up the half ring and turn it counterclockwise in the OTKP direction. The bottom initially hinges to the left, being held on by a small post. You can remove the bottom plate, along with the winding spool, and prepare to load your film.
In order to load film, the leader must be cut in a specific way so the pressure plate can correctly engage. This method is highly recommended, but it is entirely possible to get uncut film loaded with a bit of luck. Once the film is attached to the spool, you load the film and spool in at the same time, moving each side bit by bit, making sure nothing is catching. Once the film and spool are set into place. you can close the bottom and turn the metal half ring again in the 3AKP direction until it fully stops. On the top of the camera, lift the rewind knob on the leftmost side, and rewind until you feel a bit of tension. Wind the advance knob and make sure the rewind knob is turning. Fire one or two shots and set the counter to zero. If all is well, then the film has been properly loaded.
Unloading the camera is a bit different. There is no rewind button, but a collar under the shutter button. Turn the collar clockwise toward the Л symbol, and it will lower slightly. You can now lift the rewind knob and rewind the film. Make sure to turn the collar back counterclockwise in the direction of the red Д symbol, to engage the sprocket and winding mechanism again.
One last thing to note is that the tripod socket is 3/8 inch instead of 1/4, and you will need an adapter for modern tripods. The tripod socket is also built into the bottom plate, so do not be too rough with it.

THE SPECS AND FEATURES
Shutter Speeds - bulb, 1/25 to 1/500th
Aperture - dependent on lens
Meter Type - none
Shutter - horizontal cloth focal plane shutter
Lens - M39 mount
Flash Option - PC port with 0 to 25 millisecond flash delay
Batteries - none
Film Type - 35mm
Other Features - non standard tripod socket at 3/8 inch, bottom loading
The Expirience
I ran across this camera many years ago while searching for Russian cameras for sale in the states. At this point I was relatively new to the Russian camera scene and only shot with the Fed 5. I really liked the look of the early separate viewfinder/rangefinder cameras, and decided to try out a Zorki. Most Russian cameras can be found at reasonable prices, and in pretty good condition. Those cameras are mostly shipping out of Russia or the Ukraine, and shipping usually takes a little over a month to arrive in America. If you buy a Russian camera that is already in the states, it’s usually at a premium or one designated for parts. I went with the latter. This camera was listed something along the lines of “ok working condition, rough with the film” and was located somewhere on the east coast. I took a chance and thought it could be something easy to handle. Along the lines of minor repair work and oiling.
The camera arrived and everything checked out right away. Equipped with a collapsible Industar-22, I cut the leader, struggled to load the camera, and went out on the street. A few shots in, I noticed the winding of the camera was getting tougher. While winding the film, I was getting a grinding feeling initially and eventually the feel of ripping sprockets. Gears started slipping as well, so I stopped for the day. I went ahead and developed the pictures, and tried to figure the problem.
It seemed like the set screw on the winding mechanism was sheered off. With no other choice, I drilled a small hole in the old screw and thankfully removed it without damaging any threads. A replacement was easy enough to find and I figured that might solve the problem. With another roll loaded I still had the same issue with tough winding and ripping sprockets. The gear slipping and grinding was thankfully gone though. I had other projects to work on and ended up shelving the Zorki for the time being. Fast forward around two years, I wanted to take the Zorki S with me on a trip and decided to take a look at it again. With a few more years of camera repair knowledge behind me, I felt that I would be able to finally figure out the problem.
I took the Zorki S apart again and did a few tests. A week or so later after taking the camera apart multiple times, I finally figured the problem. Someone must have dropped the camera at some point and dented the top plate. Everything was perfect mechanically but the top plate was pushing the rewind spool down a millimeter or so; causing a tight fit for the metal film canister. If you were not looking for this, it was so slight that it was difficult to see. I struggled to bend the case and mechanism back, fearing I would wreck something, but eventually bent the plate back into shape. I finally had a fully working Zorki S.
I took the Zorki S with me on the trip and hoped for the best. The pictures turned out incredible, and I have one of my favorite pictures I’ve ever taken. The Zorki S along with the Industar-22 has found its place as one of the best cameras I’ve ever used. No wonder Russia took the Leica II and expanded upon it. An incredibly compact rangefinder and a comfortable camera to use all around. It’s amazing how relatively simple this camera is and how easy it is to take apart. I've had this camera for about three or four years now, and I plan to keep it forever. It holds a special place in my life, being with me on trips and some important moments. This camera really taught me a lot about tolerances, lubrication, how winding works, adjusting a rangefinder, and the list goes on. The Zorki S really is a special camera to me. I find myself drifting back to this camera every so often and it really fits like a glove. Fast to focus, a small form factor, and a beautiful design. The Zorki S is an incredible camera paired up with the Industar-22, I highly recommend everyone gives this camera a try.